
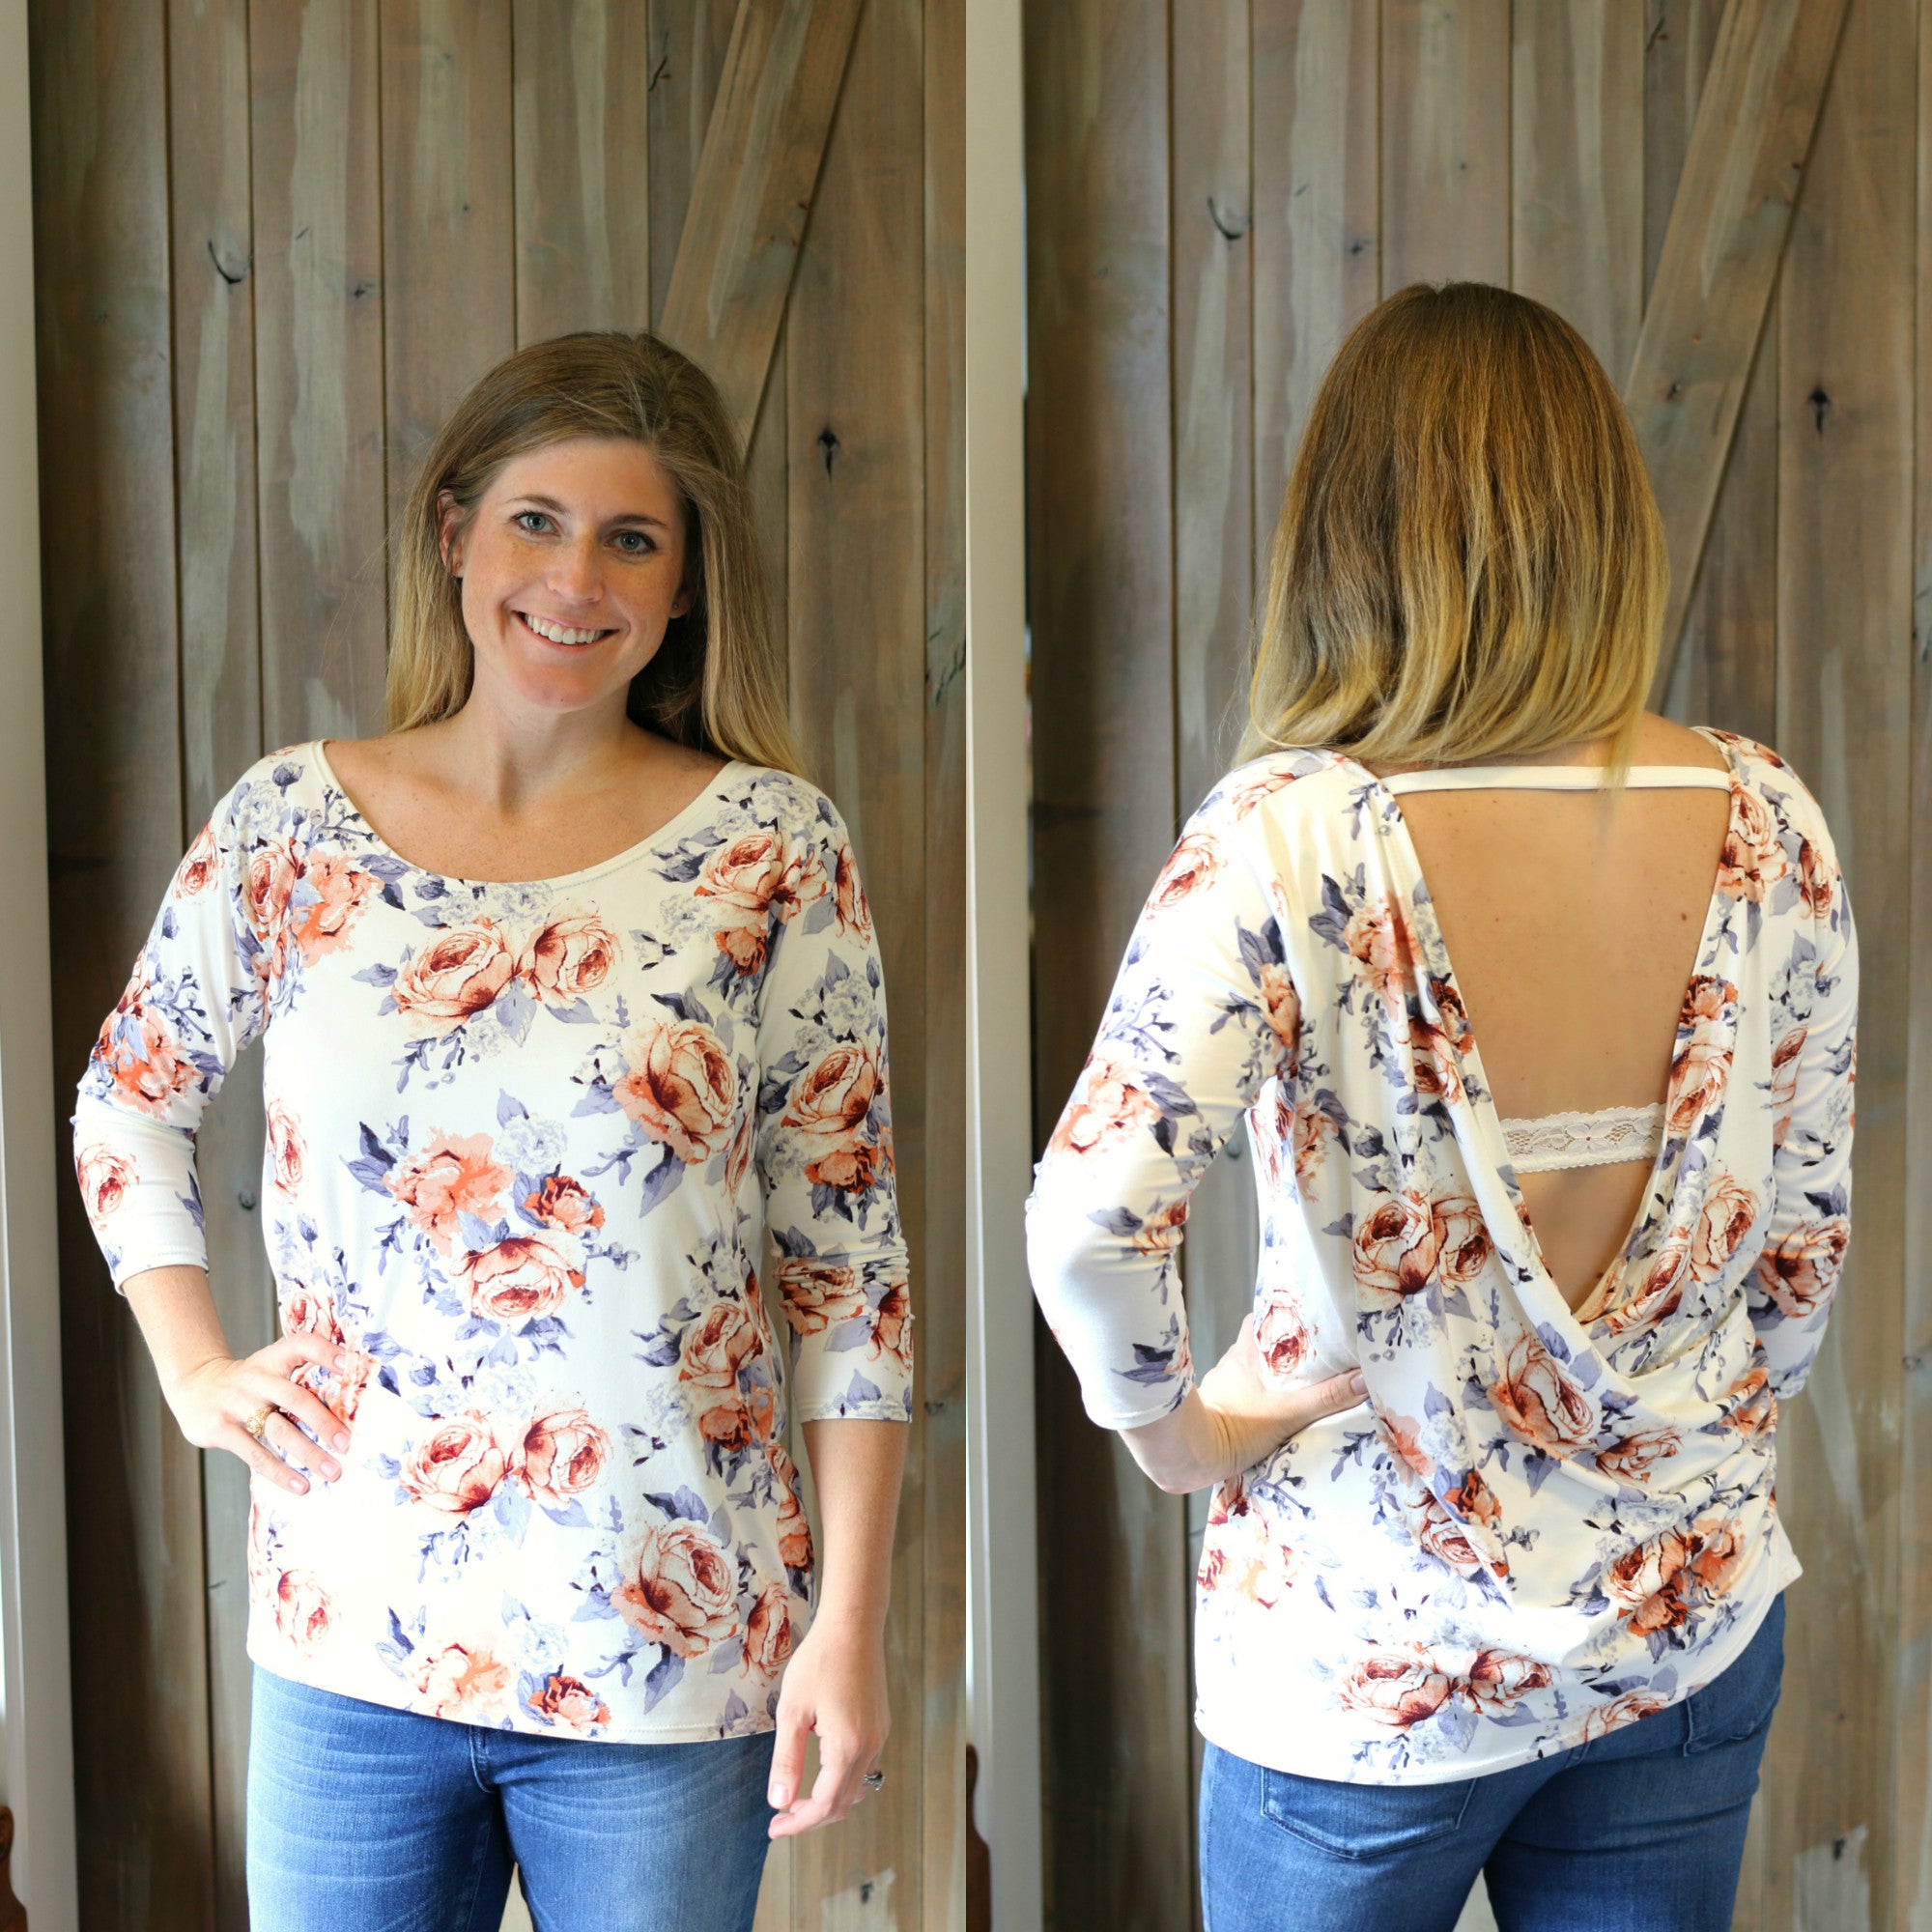

I chose to mash the Women's Highlander Dolman and Solstice Wrap during Mash-up March and love how it turned out!! I'm always on the look out for new trends and design ideas. This time my inspiration came to me while I was at the gym of all places. Running on the treadmill, thinking of Mash-up March ideas and a girl so happened to hop on a bike right in front of me and she had on a top very similar to this. I knew immediately I had to recreate it! I had originally planned to add the t-back to it, but since this fabric is more fancy looking I decided on just the back strap. Here is a look at how the long t-back from the Highlander works really well with this mash too!

You will need to go ahead and print and assemble the front pattern piece from the Highlander Dolman. As well as the back bodice and long sleeve from the Solstice Wrap.
Lay the Highlander Dolman front pattern piece down on your cutting mat. Then lay the Solstice Wrap (front or back piece doesn't matter) on top of the Highlander Dolman. Match up the shoulders and the side seams of the pattern pieces.
Using the Solstice Wrap as a guide, cut the new armscye for the Highlander Dolman.

We'll need to make one more edit to the bottom of this piece, but here is what the top of the front bodice should look like now.

Next, make sure your shoulders for the pattern pieces are still matched up. Draw a line using the width of the Highlander and length of the Solstice. As I have done (red line) in the photo below.

Your front pattern piece should now look similar to this (minus the pattern page numbers and dashes being different, this was from the drafting stage of the pattern).

Go ahead and cut out your front bodice. You will need to construct your front bodice before making the adjustments to the back pattern piece.

Cut the neckband per the chart above.

Fold neckband wrong sides together and press.

Find the center and pin.

Grab your front bodice and lay right side up. Find the center and pin.

Taking the neckband match up the center mark for both the bodice and neckband, pin. Match up both ends of the neckband with the bodice shoulders and pin. Serge your neckband on stretching slightly to fit.

This is what your bodice should look like right side up.

Flip the bodice piece over so the wrong side is up.

Now you are going to fold over the neckband to cover the seam. Edgestitch.

This is what your bodice should look like now. Next, measure the shoulder. Take this number and add .5", this is the length of the shoulder needs to be on the back piece as shown in the next photo. For example, this one measures 3.5" so we will adjust the back piece to 4".

Measure out the distance calculated in the previous step, starting at the armscye. Place a mark and then blend this into the curve of the back pattern piece. Cut off the extra bit on the top left of the pattern piece.

We will be adding 2" to the left side of the pattern piece which will give it the drape.

Lay paper under the pattern piece and tape it in place. Grab your straight edge and measure and mark two inches.

It should now look like this and you can cut away the excess paper.

You are now ready to cut your back pattern pieces.
I used the Solstice Wrap long sleeve and made a few adjustments to it since the Solstice sleeve has more of a relaxed fit. I chopped 7" off the bottom to make it 3/4 length. To get the more fitted look like in my pics you will need to take the sleeves in. You could either use the width from another one of your long sleeve patterns (just make sure you keep the sleeve cap the same as this one so it fits this armscye. Or you can do as I did and make as is and take them in afterwards. You could also try on the top inside out before sewing the sleeves/side seam and pin/mark how much you would like to remove from the width of the sleeve.

Fold under the curve of the back bodice .5" and press. Sew. Repeat for remaining back bodice.
Hem the bottom of all three bodice pieces (2 back, 1 front).
Head to page 10 of the Solstice Wrap tutorial to complete construction.
We hope you enjoyed this mash-up as well as all the inspiration we saw on IG/FB during SSD Mash-up March!!
xoxo,
Mandalynn and Ashley
Comments will be approved before showing up.
Houston McGuirk
June 19, 2017
Wow, fantastic mash up and such great instructions! I am going to have to grab these patterns soon, this is so similar to a workout top I was eyeing that was way too expensive and not the right color!