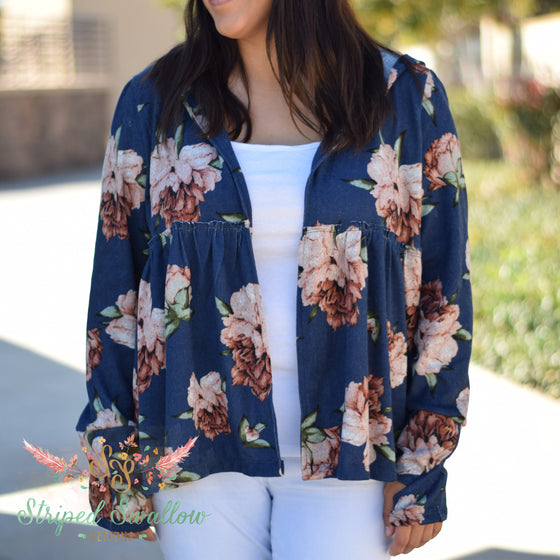

Today I have a fun addition to make the already amazing Cloud 9 Tee even better...free sleeve flounce pieces, woo! This flounce detail is a trendy add-on to the already free Girls' and Women's Cloud 9, not to mention a simple and quick addition!
Shown on the long sleeves here, but super cute on the short sleeves as well! If you haven't already picked up the Cloud 9 Tee, head to our SSD Sewing Group on FB and grab the group exclusive coupon code in the pinned post to pick up the Cloud 9 patterns for free!
Women's Pattern Note: for the women's pattern you will want to cut along the long sleeve armscye line on the pattern piece, even if making short sleeves with flutters you'll want to use this line.
Girls' Pattern Note: adding the flounces to the short sleeve of the girls' pattern will hit at their elbow. If you prefer a shorter sleeve, just trim a bit off the sleeve of the bodice pattern piece.

Next you'll want to download the sleeve flounce pieces here (girls' pieces located on the first page and women's on the second).

Next I will walk you through the steps on how to fold the flounces (it is folded just like a circle skirt).
Lay the fabric out with the grainline running vertically, I like to start with my fabric face down.

Fold the fabric down.

Next take the left side of the fabric and fold it over.

It should look like this now.

One fold on the left.

And two folds at the top.

Line up the pattern piece so that the two straight sides match up with the folds. (Note: if you would like to shorten or lengthen the flounce, you would do so by redrawing the curve at the bottom of the pattern piece.)

Cut along the top and bottom curves.

This is what you should have now. Repeat and cut 1 more flounce.
Construction will vary just a bit from the pattern tutorial so that we don't end up with a seam line on the flounce.

Sew the hems on the sleeves and bodice per the tutorial. Then sew or serge all the seams (sleeves, neckband, shoulder and side seams) as shown above.

Flip the bodice and sleeves inside out and press all the seams.

Grab the flounce and fold it RST (right sides together).

Slide the flounce on the sleeve, RST. Pin in place.
Short sleeves: Sew or serge. Repeat for the other flounce. Then head back to the tutorial and add the neckband to finish the Cloud 9.
Long sleeves: Set your machine to the longest stitch length and baste 3/8" (1cm) from the edge. Repeat for the other flounce.

Flip the sleeves wrong side out, with the smallest end of the sleeve closest to the bodice. Making sure the seam of the sleeve will match up with the seam under the arm on the bodice.

Slide the sleeve onto the bodice. Match up the sleeve seam with the bodice seam (double check it's the one that will be under the arm!). Pin in place.

Continue pinning the sleeve. Sew or serge with 3/8" (1cm) seam allowance.

Flip the sleeve out and check out that cuteness! Repeat for the other sleeve, add the neckband and you are done with your Cloud 9!

xo,
Mandalynn
Comments will be approved before showing up.