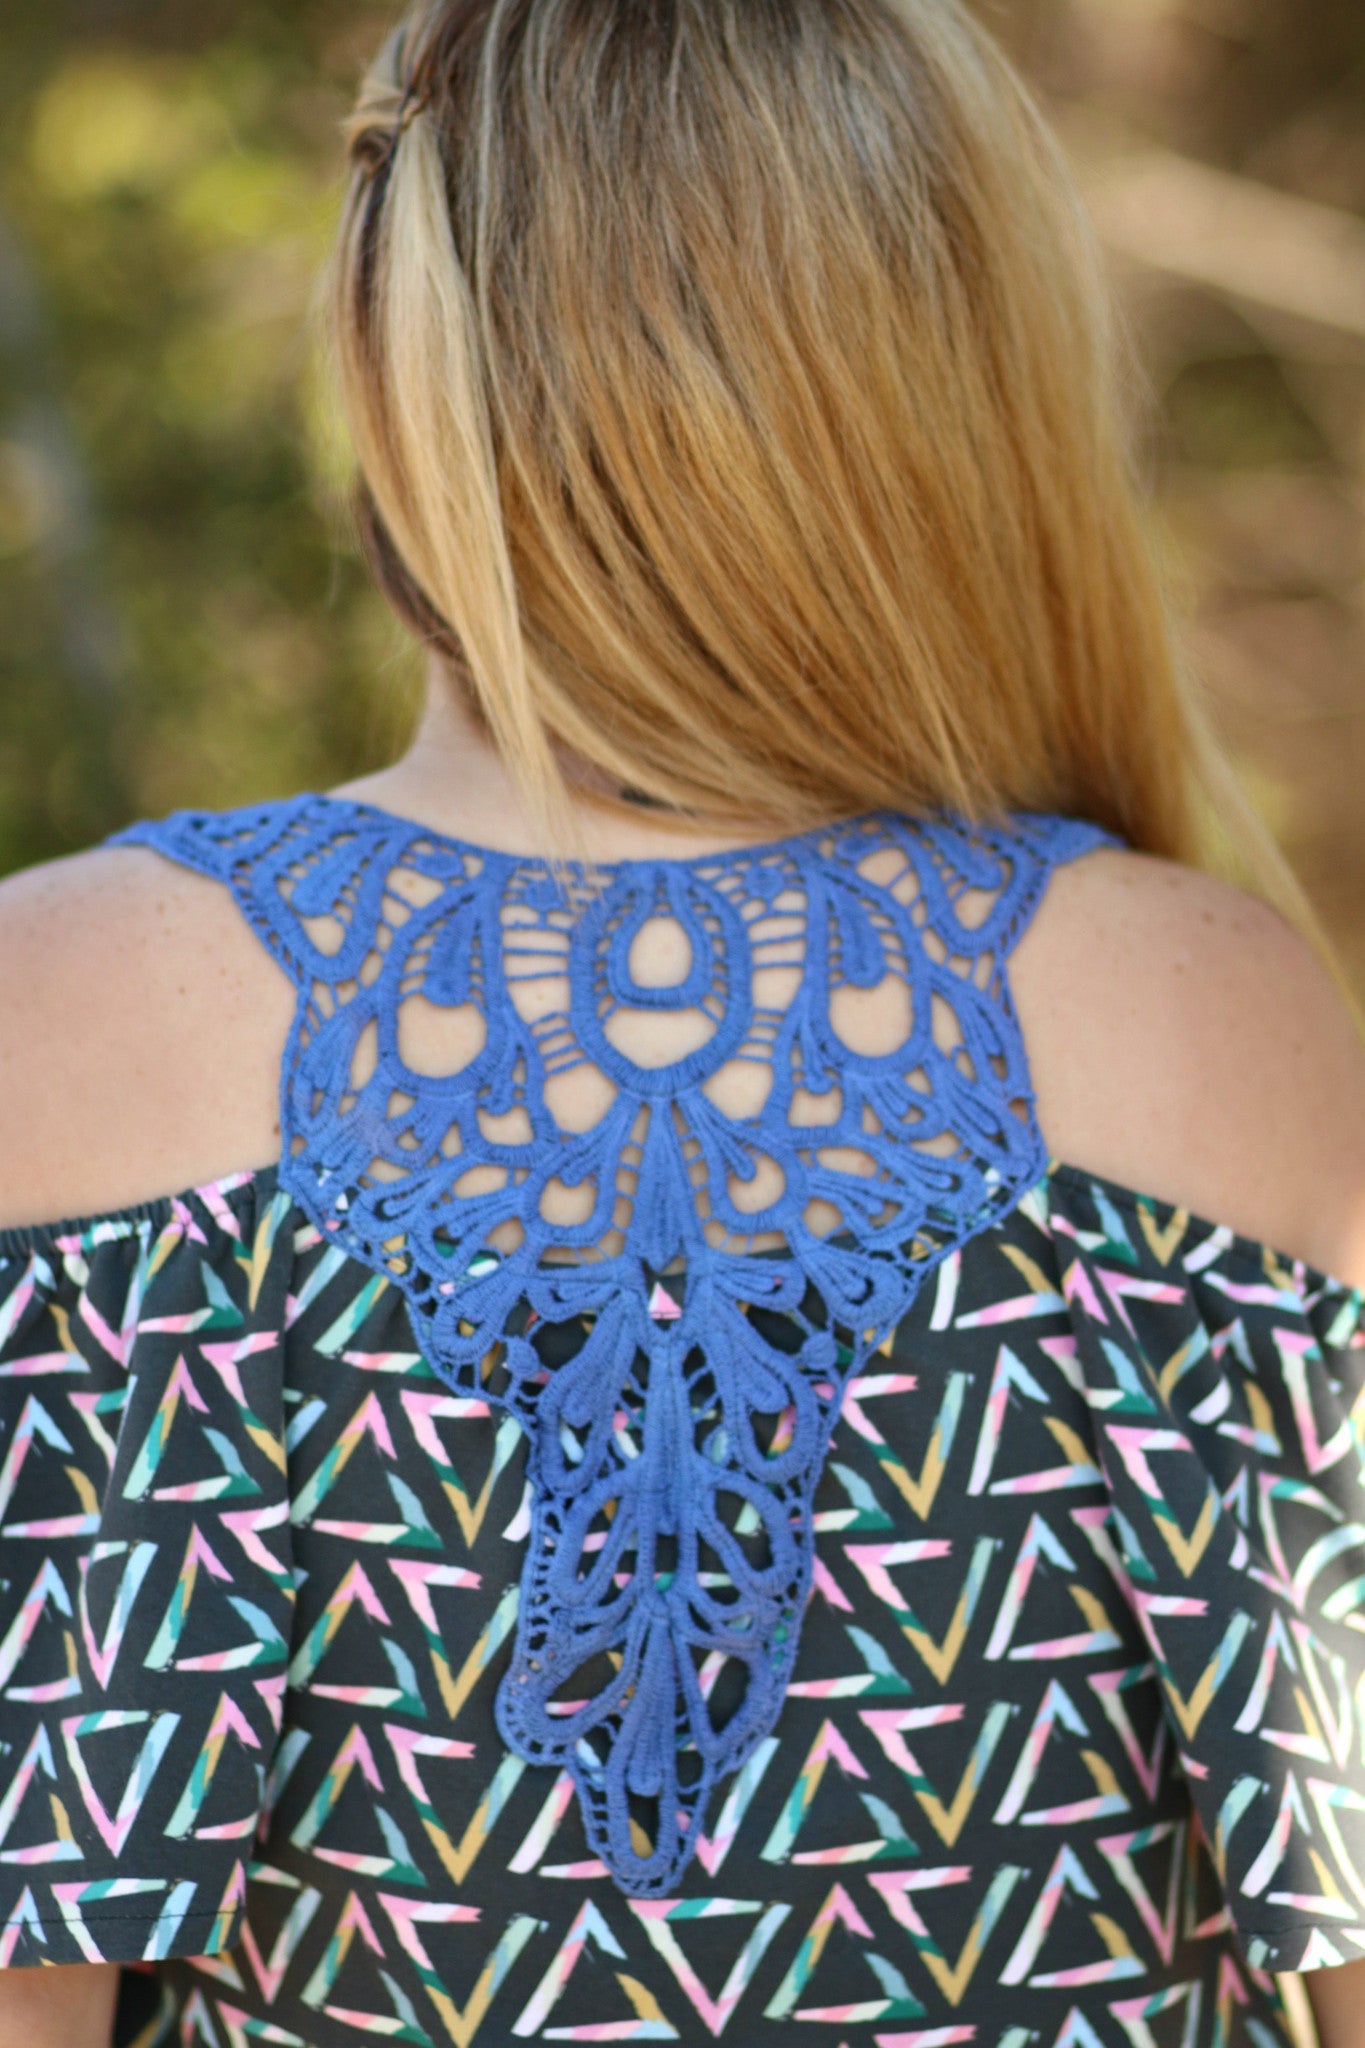
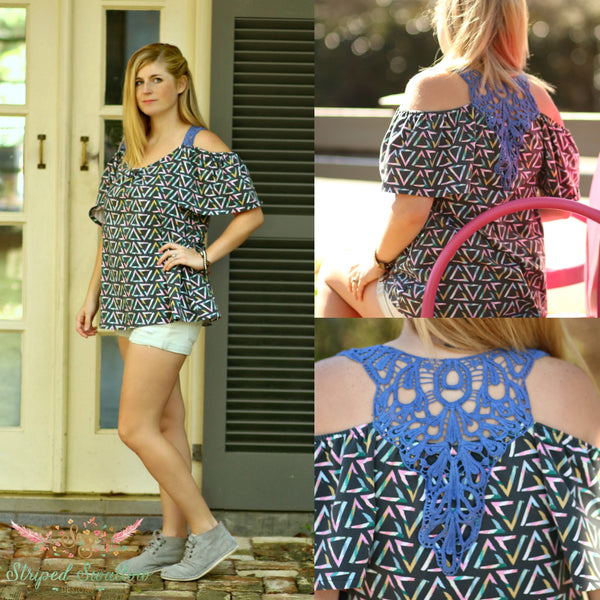
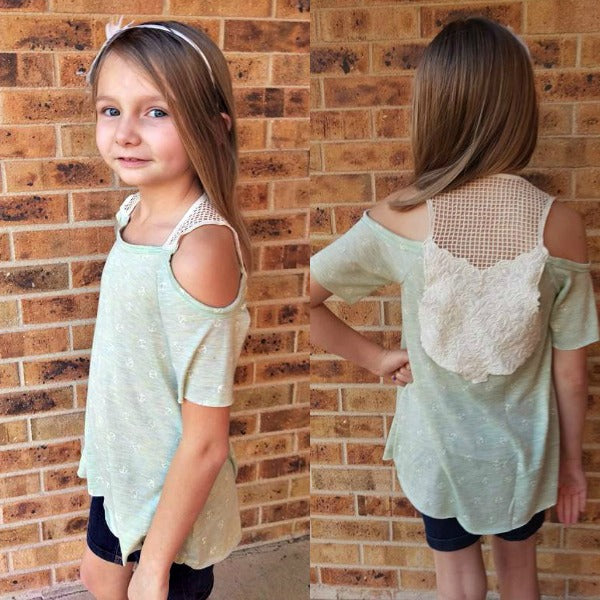
I've always loved crochet appliques, but could never find a could source to purchase them or never came across the perfect pattern... Then one of my sweet sewing friends, Savanna, made her daughter a Desert Breeze with one during the girls' testing and I fell hard! She was kind enough to share where she purchased the appliques and I ordered some right away! The blue one on my DB top is from paviapavia and the one below is from Sincerely Riley.
If you don't already own the Desert Breeze pattern you can purchase the girl's pattern here or the women's here. There is also a baby version or grab the bundle with all the sizes here.
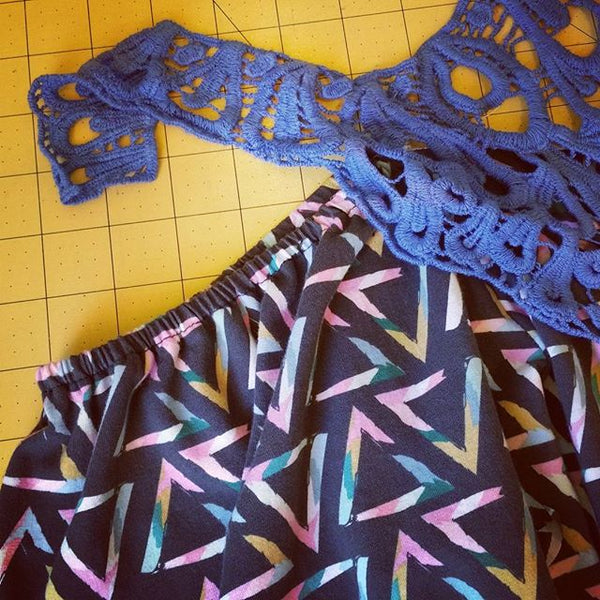
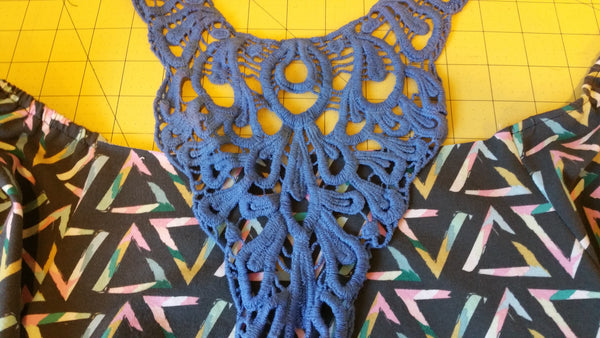
First, you will want to lay the applique on your back and make sure that the applique is going to be big enough. I ordered 8 different appliques and half of them ended up being on the smaller side and the ends wouldn't reach down far enough to be straps on me.

This one ended up being perfect and was also the perfect color to go with the awesome Art Gallery knit from Sew Caroline's Chalk and Paint collection (purchased from Raspberry Creek Fabrics).
You will then follow the directions in the Desert Breeze pattern (links to patterns provided above) until you get to the binding/straps instructions on page 15. I chose View A and flutter sleeves with elastic, but feel free to choose any sleeve or view...they will all turn out great with the applique!
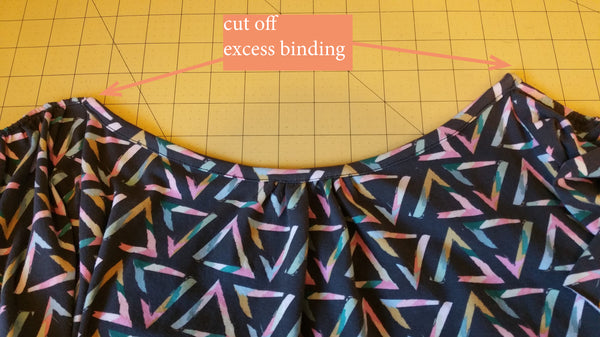
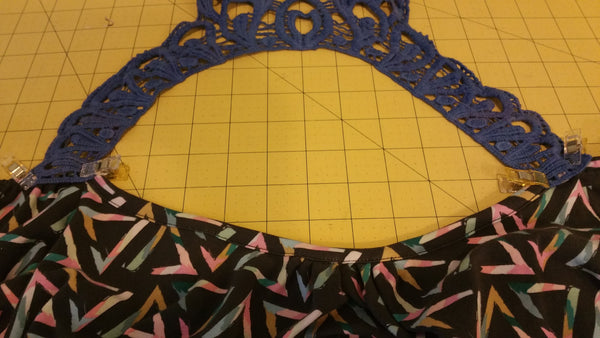
Go ahead and attach the binding as indicated on the front neckline (hold off on attaching the back binding). Cut the excess off so that the front of your top resembles the above photo.
Decide where you would like your applique to be attached on the back and pin in place. (Don't worry about the width of the back piece if it's too wide for the applique, we will fix that shortly.)

Now you will need to decide where you will attach your straps. It really just depends on the width of the applique and how you would like your top to hang. So put your top on and try both locations to see which one you like the best. Don't forget to check the back of your applique and see if it's pinned in the correct position as well.
I decided to attach the applique to the sleeves for my top (both pieces are laying right side up in this photo).

Sew the straps to the top/dress. I wanted my strap sewn on the front of the top as shown here, but you could of course sew it behind as well.

If you are lucky and your back is the same width or shorter than the applique then you can follow the steps below, just skip the gathering. If the back of your top/dress is too wide for the applique (you can see how I have a bunch of extra fabric in the middle), you will need to gather the back before sewing a binding on. To do this...

Measure the width of the applique where you will be attaching it to the back.

Take that measurement and subtract .5" this will be your width for the binding. Cut a strip that is 1.5" x width you just calculated.
Go ahead and unpin the back from the applique, but make sure to mark or leave pins on the applique so you know where you plan on sewing it on.

Gather the back of your top/dress and spread out the gathers evenly to match the width of your binding you just cut. Sew the binding on using the same method as shown in the pattern.

The back should look similar to this now.

Now it's time to pin the applique back onto the back of the top/dress...then sew it on like crazy! :)

Here's what the underside of my top looks like. I sewed around the edges and a few places in the middle to secure it.

Snap some photos of your creation and come share in the Facebook group or on IG using #desertbreezetop or #desertbreezedress! I would love to see all your beautiful crochet back DBs!!
Hope you enjoyed the tutorial!
xoxo,
Mandalynn
Comments will be approved before showing up.